Add a Basic Event
You can create simple events in Xsponse using the Basic Configuration, ideal for straightforward scheduling without advanced options.
To Add a Basic Event
- Go to Events in the main menu.
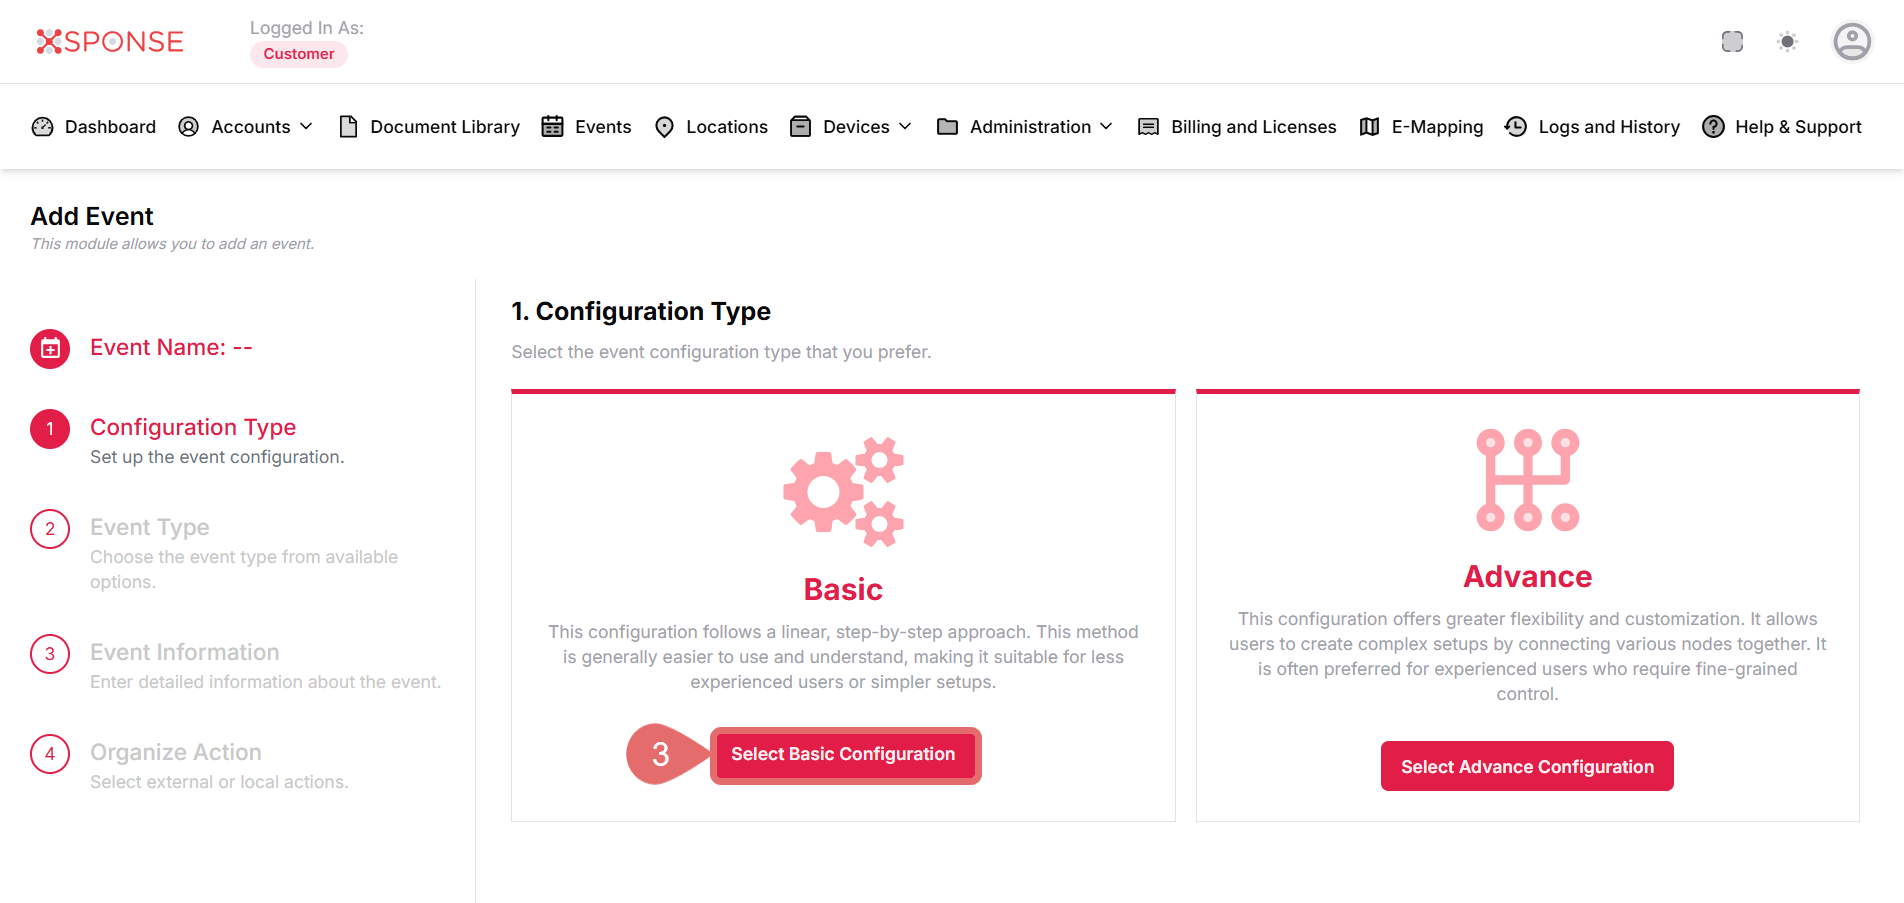
- Select the Add Event button.

- Select Configuration Type as Basic.
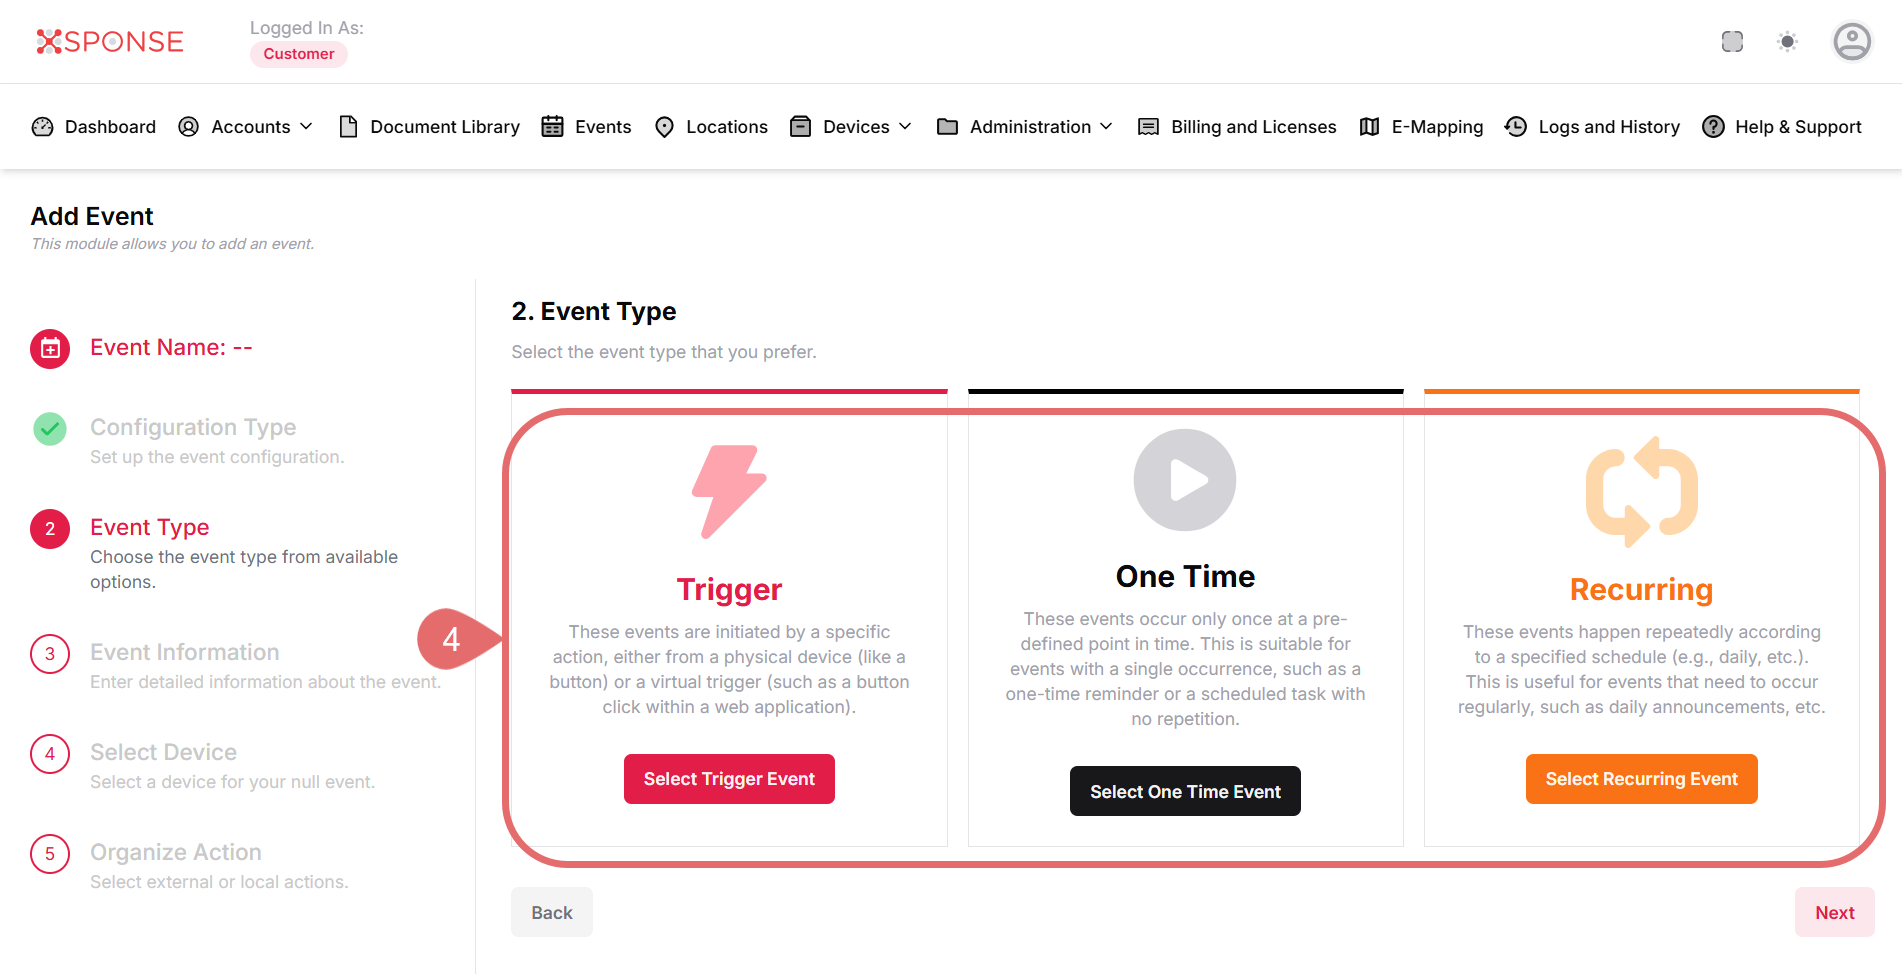
- In Event Type, select:
- Trigger: Executes when a specific trigger condition is met (e.g., a sensor or device state).
- One-Time: Executes once on the scheduled date.
- Recurring: Repeats based on a set interval (daily, weekly, etc.).
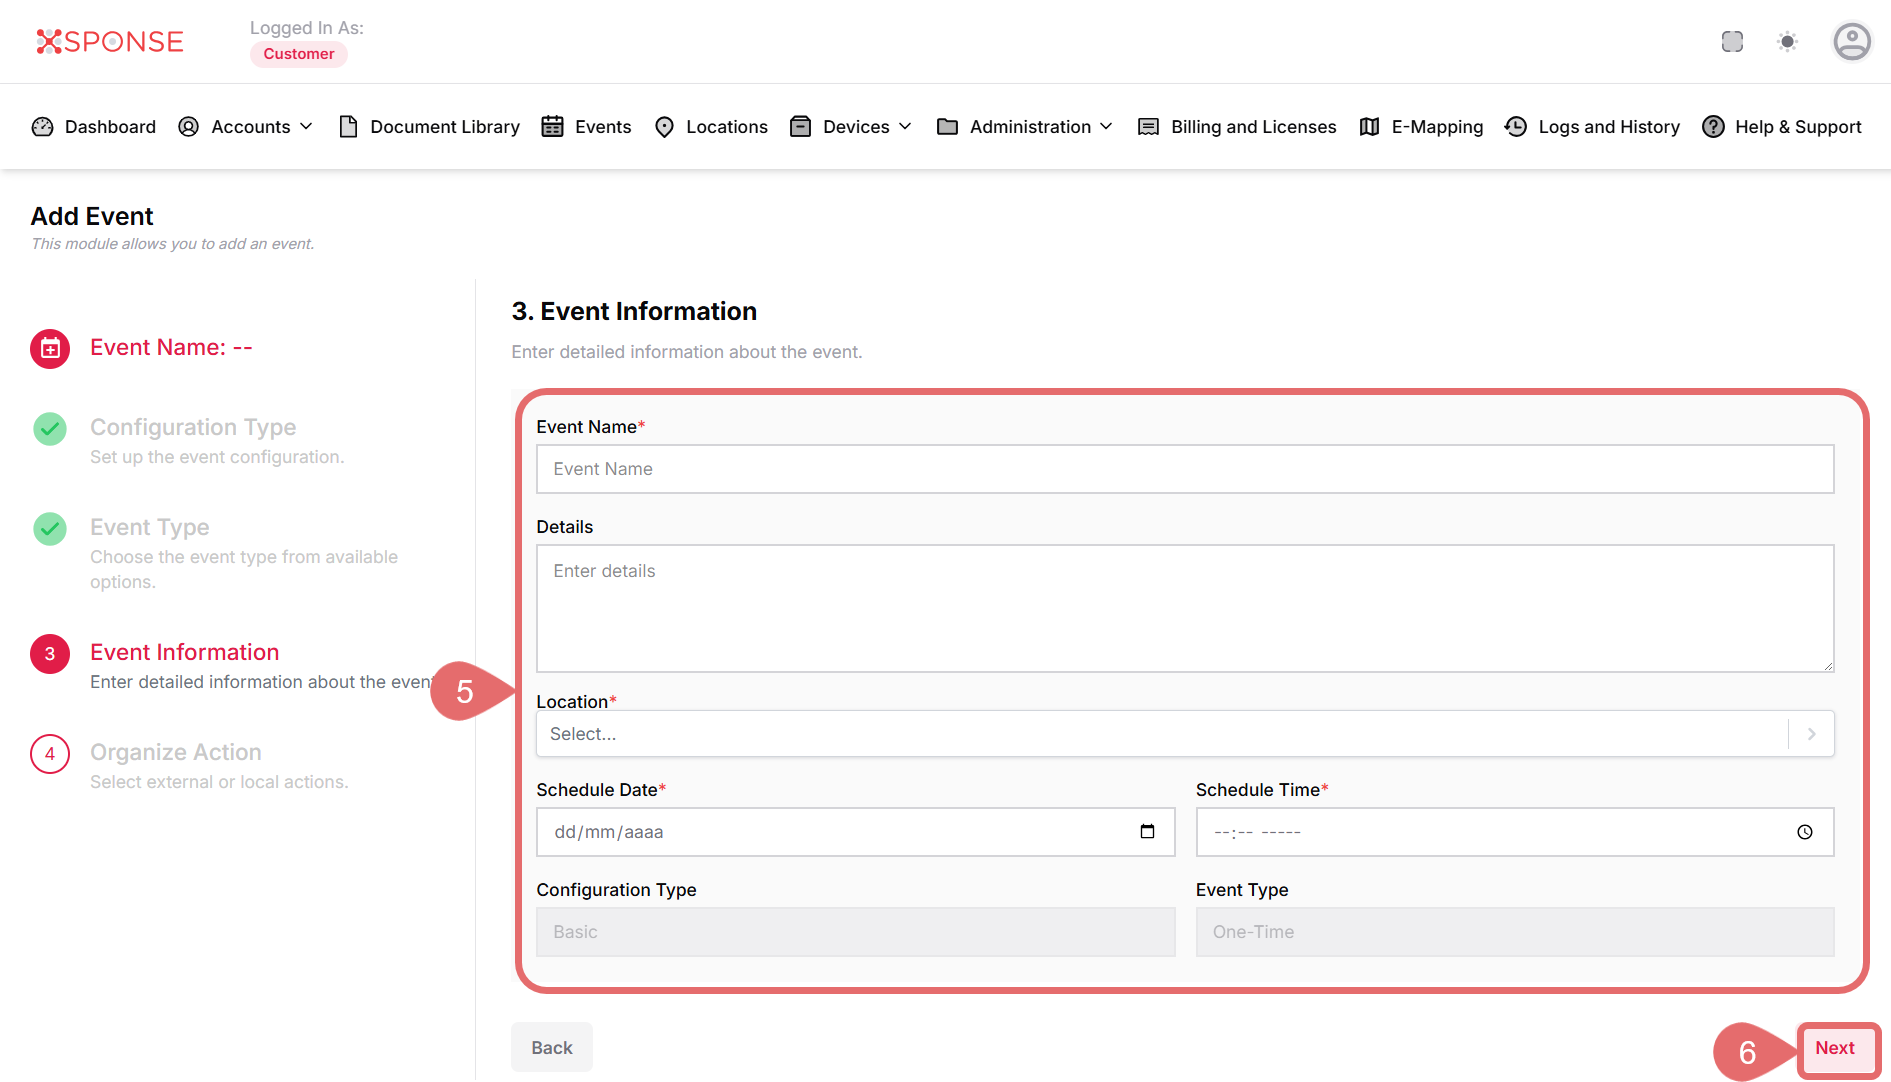
- Depending on the type selected, configure the fields following:
- Event Name: Enter your event name (e.g., "Lights Off").
- Details: Add details you want to specify about the event.
- Location: Select the location from the dropdown menu.
- Schedule Date: When selecting a One-Time event, choose the date.
- Schedule Time: When selecting a One-Time event, choose the time.
- Configure Type and Event Type: These are non-editable fields displayed with pre-selected options.
- Click Next to continue.
Conditional Configuration
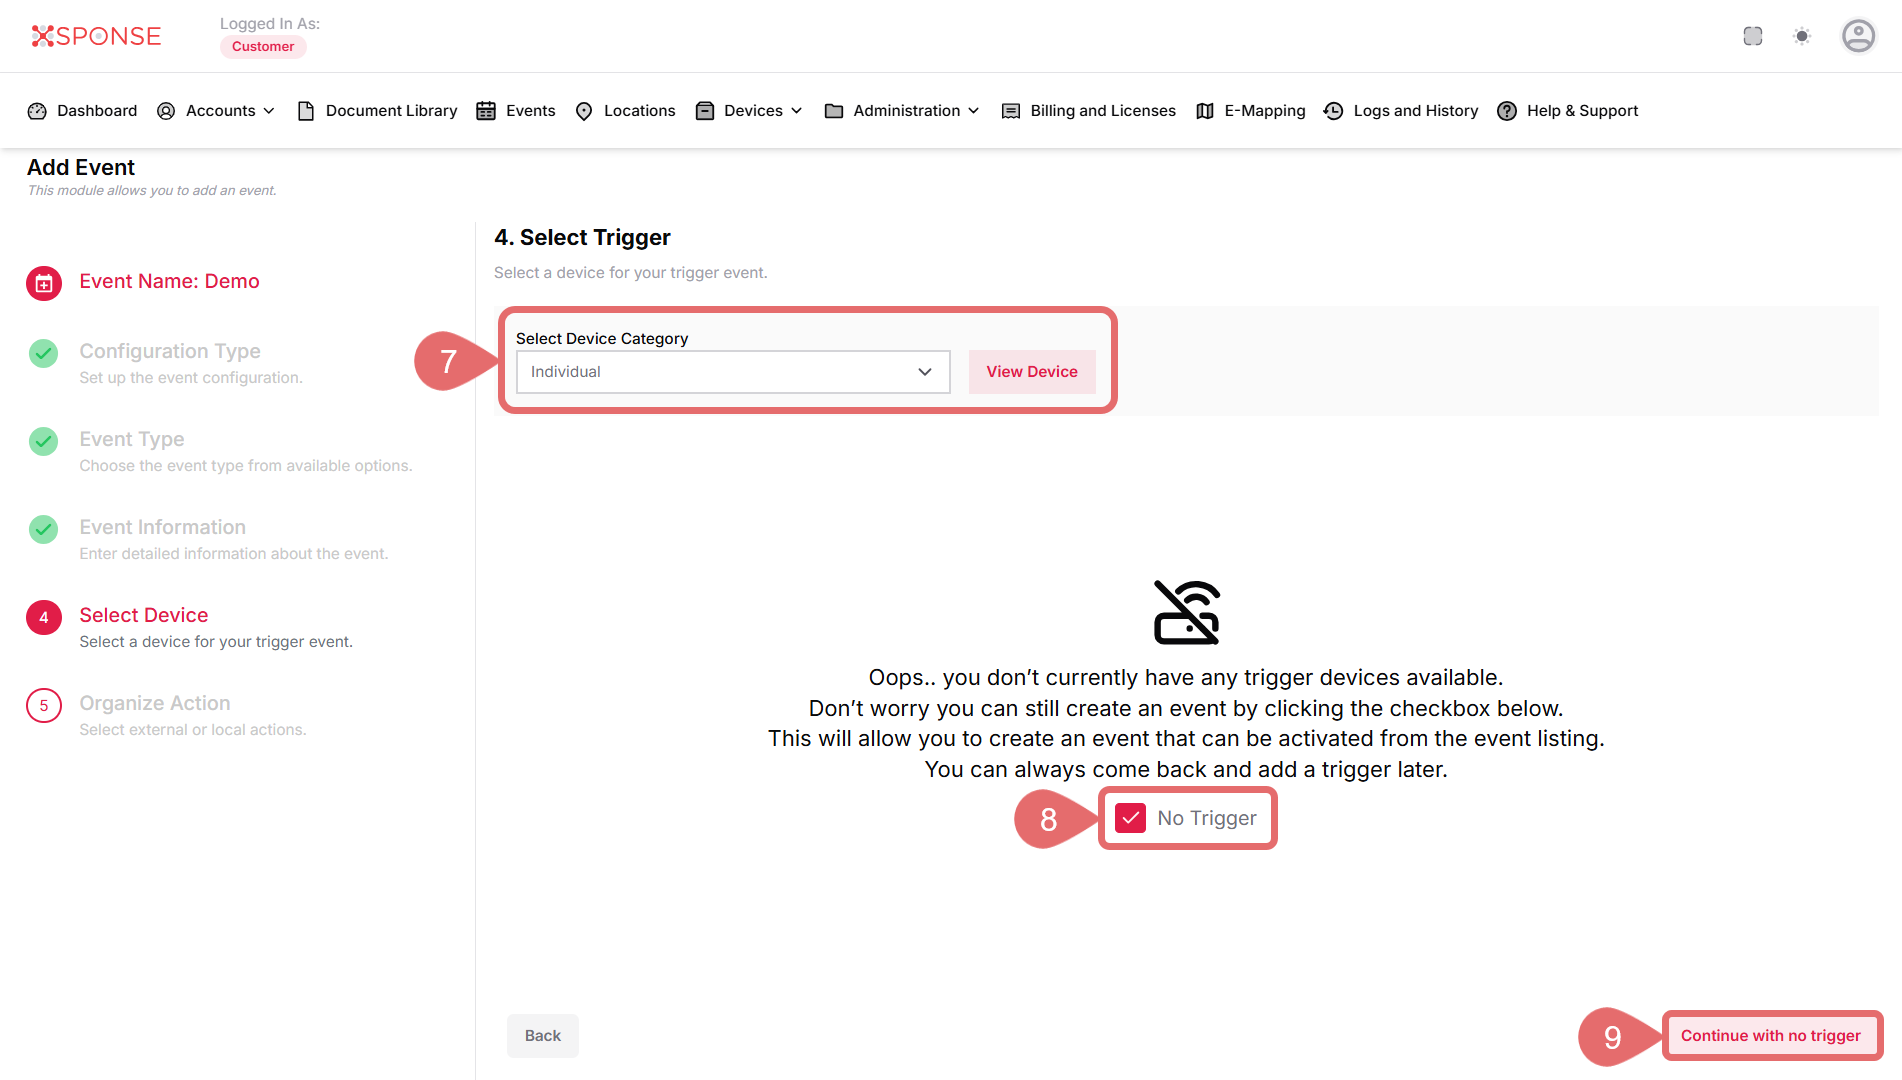
Steps 7 to 10 should only be configured if "Trigger" is selected in the previous step.
- All
- Individual
- Grouped
- Select the No trigger checkbox, if you don't want to set a trigger device.
- Click the Continue with no trigger button.
- Click Yes to confirm or Cancel to exit without creating the event.

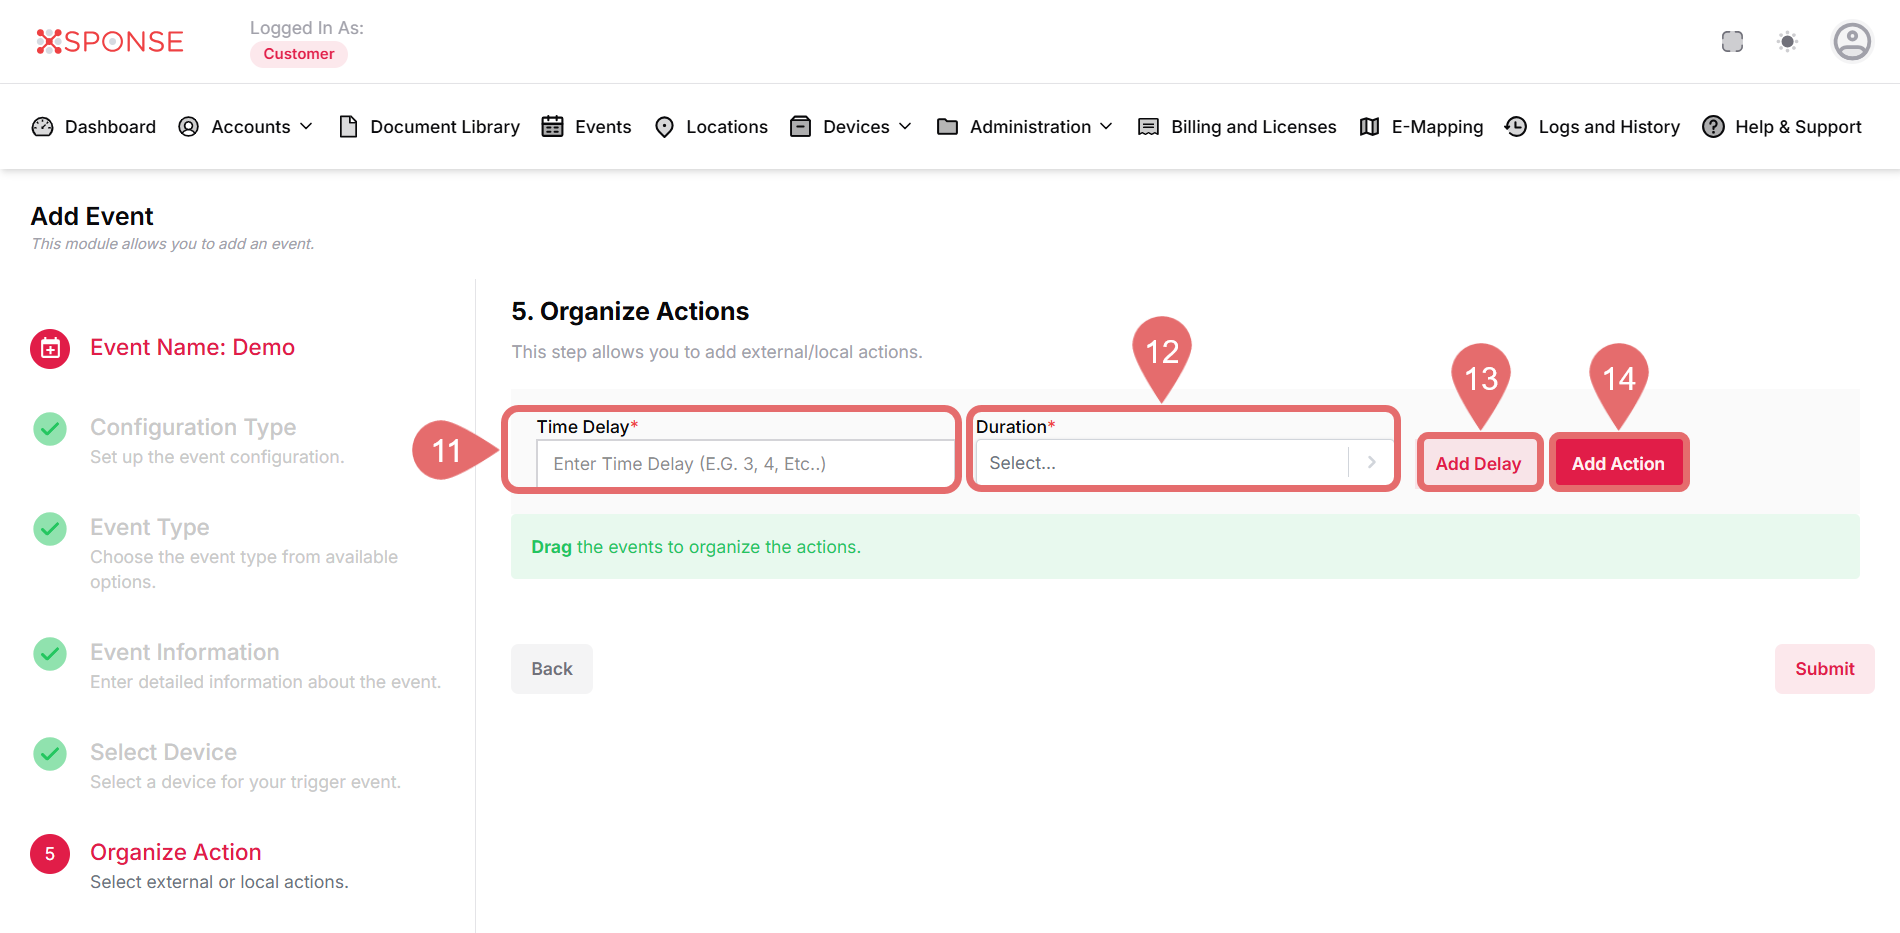
- Enter Time Delay.
- Select the Duration from the dropdoown menu.
- Click Add Delay to save the delay; otherwise, it will not be stored.
- Click Add Action to define what the event will do.
- Select the action type that you prefer.
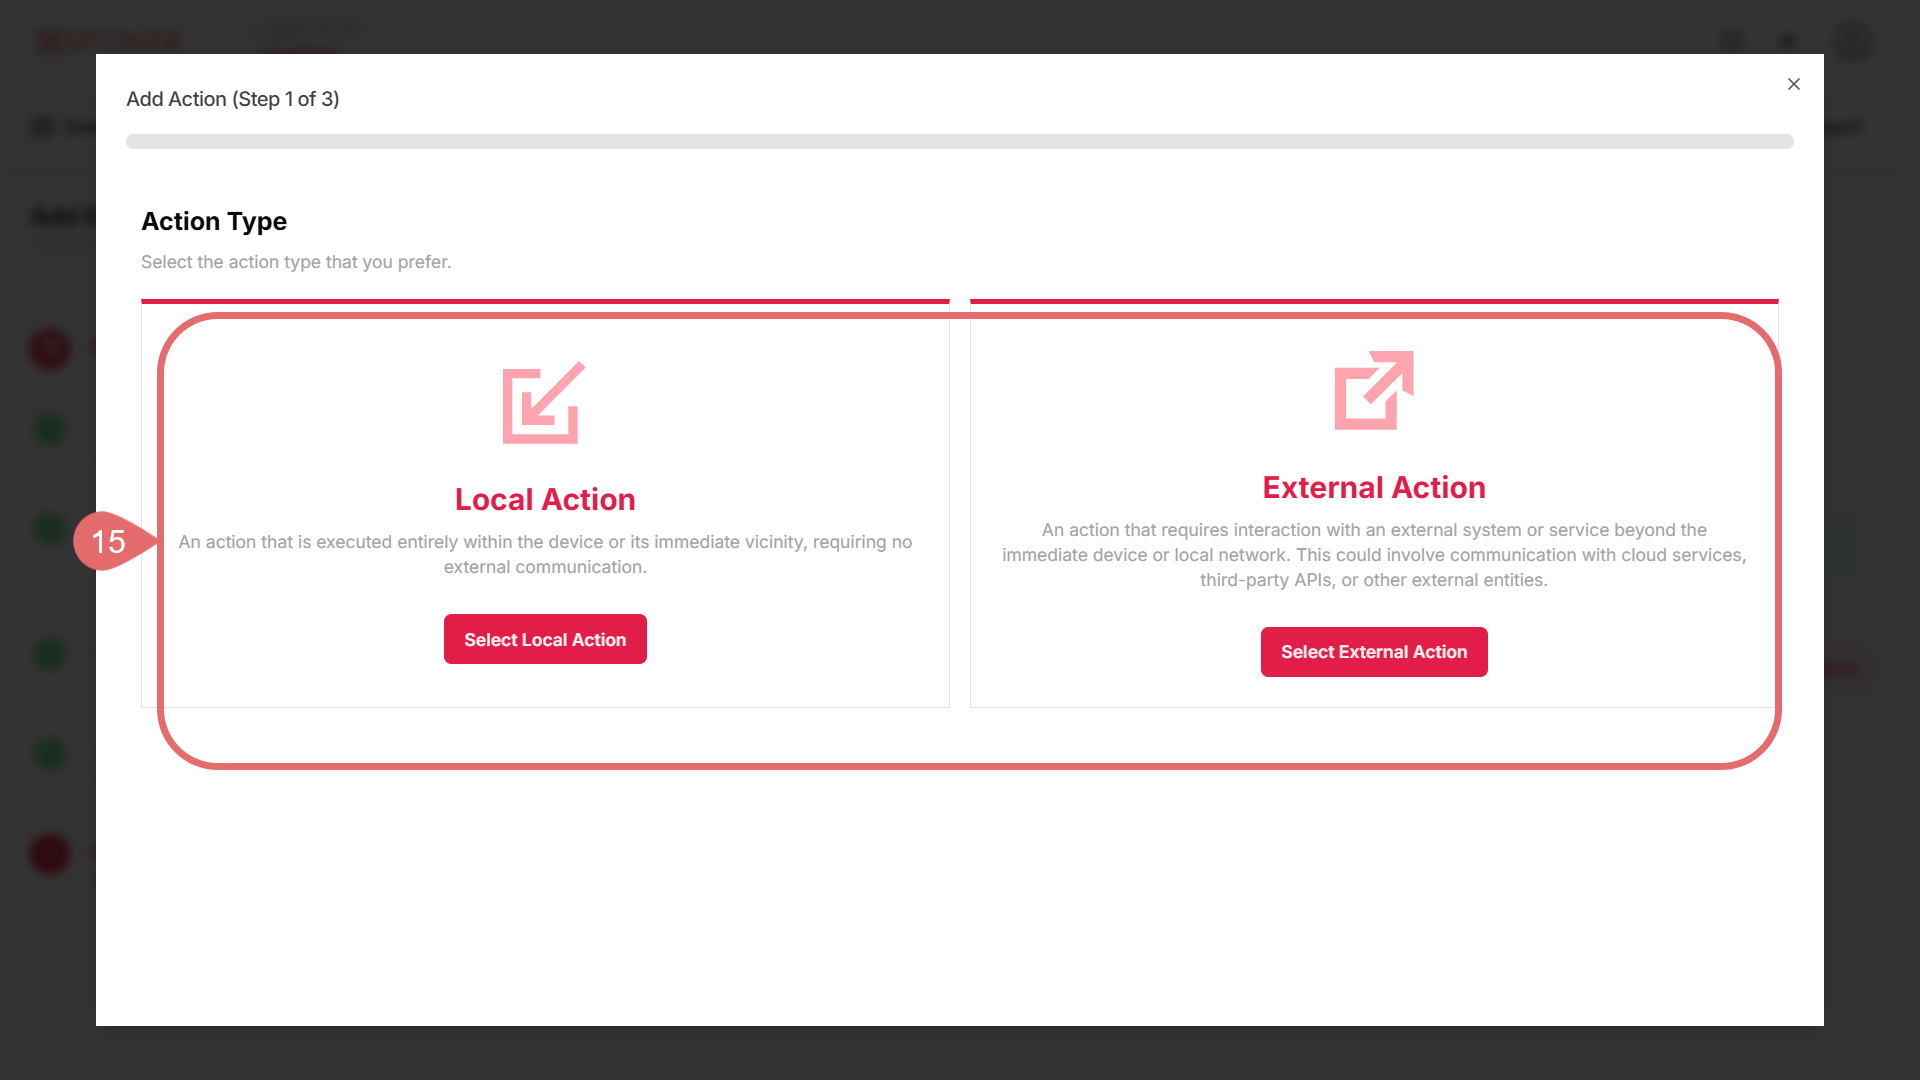
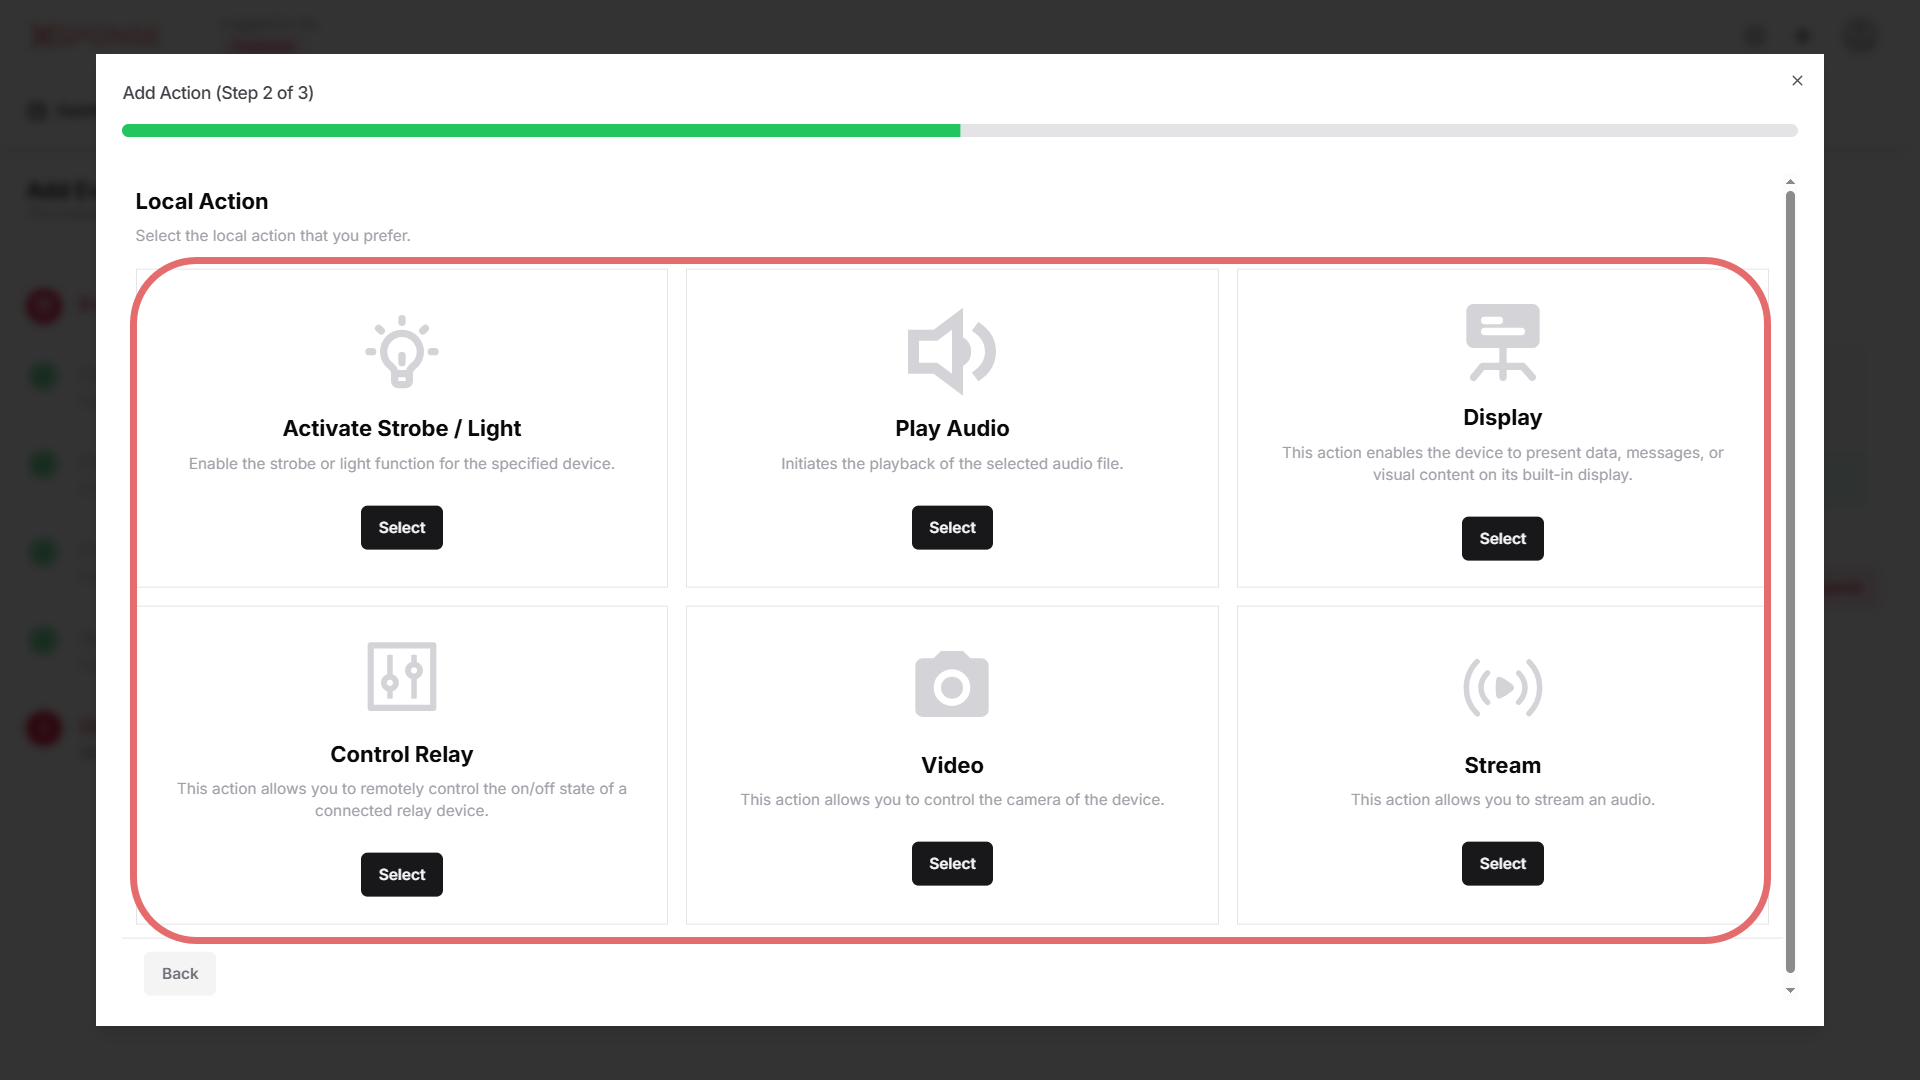
- Local Action: Select the action to be performed directly on the device or system.
- Activate Strobe / Light: Enable the strobe or light function for the specified device.
- Play Audio: Initiates the playback of the selected audio file.
- Display: This action enables the device to present data, messages, or visual content on its built-in display.
- Control Relay: This action allows you to remotely control the on/off state of a connected relay device.
- Video: This action allows you to control the camera of the device.
- Stream: This action allows you to stream an audio.
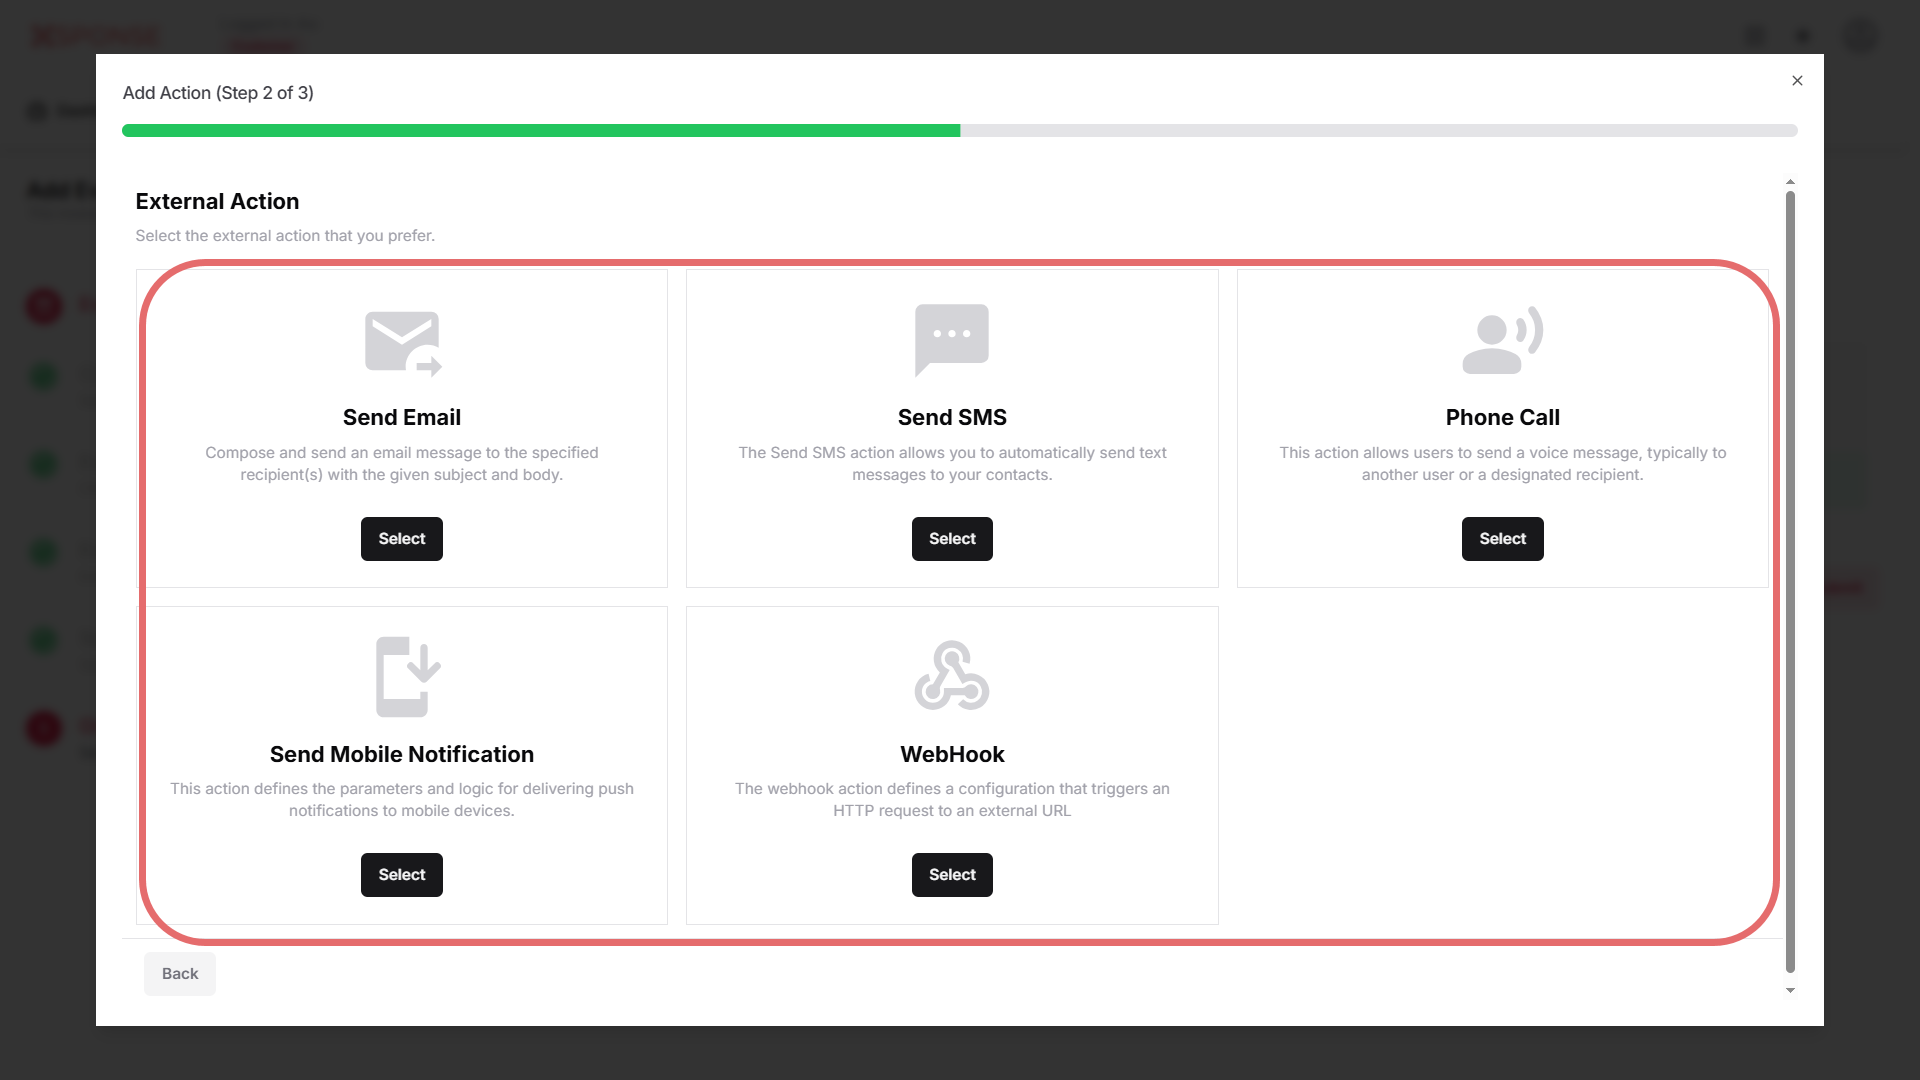
- External Action: Configure actions that interact with external services or systems.
- Send Email: Compose and send an email message to the specified recipient(s) with the given subject and body.
- Send SMS: Automatically send text messages to your contacts.
- Phone Call: Send a voice message, typically to another user or a designated recipient.
- Send Mobile Notification: Define parameters and logic for delivering push notifications to mobile devices.
- Webhook: Trigger an HTTP request to an external URL, for integration with other systems or services.
- Local Action: Select the action to be performed directly on the device or system.
- Enter the required fields based on the action type selected in the previous step.
- For Local Actions, complete:
- Device Category: Select Individual or Group.
- Device Type: Choose the appropriate type for the action.
- Available Devices: Select from the list.
- For External Actions, the fields vary depending on the specific action selected. These may include:
- Title
- Recipients
- Subject
- Message
- REST Method
- API Endpoint
- Headers
- Message Body
- Notification Type
- Target Screen
- Send message to guest users?
- Notification Title
- Click Save to apply changes.
- Click the Submit to create event.
See Also
To complement your knowledge of this process, check the following pages: